
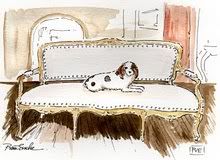
So, I know I’m late to the burlap party, but I finally made these pillows that I’ve seen all over blogland:

This is my first attempt at a tutorial, so please bear with me.
Supplies
burlap fabric, pillow or pillow form, iron-on transfer paper, sewing machine, computer, printer, design or clipart
You could also use iron-on tape adhesive instead of machine sewing, but the burlap is pretty thick and might not hold up to wear and tear as machine sewing.
1. Pillow form- I used 18” square down pillow forms that I found on ebay, but you could use any size pillow or form.
2. Design. I found some design examples online. Just Google, “burlap French pillow” and you will find a lot of inspiration. I also use books from Dover Publications. They have tons of books with clipart (you can also find these at your library). Search Google also for French clipart- crowns, laurel wreaths, Paris, etc.
3. Computer. I created my design in Microsoft Publisher, but you could use PowerPoint, Photoshop, Word, etc. I combined an Old English font and the design.
After you create your design, be sure to flip the design to reverse the image.
 Print out your image onto the iron on transfer paper.
Cut 2 pieces of burlap 1” larger than your pillow size. For example, my pillows are 18x18”, so I cut my pieces 19x19”. (might want to iron them)

Fold into fourths.

Cut a rounded corner. This helps prevent floppy corner pillows.

Lay your 2 pieces of burlap together and sew all around except for an opening at one end. (I don’t worry about seam allowances- I just eyeball 3/4” or so.

Turn your pillow right side. Poke out the seams and iron so they lay flat.
Center your design transfer paper onto the pillow and iron according to the directions for the transfer paper. Iron on a flat, hard surface. (I used a wooden cutting board).


Stuff your pillow inside the pillow cover and then machine or hand whipstitch the opening closed.
Voila!! You have completed a decorator-style French grain sack pillow for pennies.


Please leave comments if you have questions. Have fun making your own designs!
I'm linking to The DIY Show Off Home Accents Party


Awesome job!
ReplyDeleteMany Blessings,
Melissa
Looks beautiful, thanks for the great instructions!
ReplyDeleteVery nice! I love those pillows too and I haven't made any. Thanks for the tutorial. I'll have to go burlap shopping now!
ReplyDeleteWhat a lovely blog! You did a great job with the pillows--they look very cool with your furniture, too.
ReplyDeleteBeautiful!! Love the "clip art" you chose. :) I haven't done burlap pillows yet, but I have done a table runner. It was easier to work with than I thought. :) I'm visiting from Kimba's party. Hope you might stop by. :) Here's my link:
ReplyDeletehttp://serenitynow4amanda.blogspot.com/2010/01/chalkboard-quote-tray.html
One word...fantabulous!!!
ReplyDeleteLiving it up at Lakewood,
Cindy
love this! WElcome to blogland! I'm following you!
ReplyDeleteThis is a great post! I've been wanting to do something similar by ironing on our initial to some dining room chairs. I've tried following the "mirror image" or flip image but I can't seem to make it work on my computer. Can you email me how you did it?
ReplyDeleteWelcome back (again) to the blog world, I think you are doing a great job!
Judy
Beautiful!
ReplyDeleteI'm glad I stopped by!
~Amy
Wow, so easy. Thanks so much for the tutorial.
ReplyDeleteAwesome and you could also check GraphicsFairy.com for a lot of neat images..
ReplyDeletetammy
I love these...but I have a question: How do you reverse the image? I have struggled with this and for years my students would create images w/o words because we could never figure it out...thanks
ReplyDeletePatti,
ReplyDeleteI use Microsoft Publisher and save my design as picture. Then create a new document, insert picture. Click arrange, rotate/flip, flip horizontal. I'm sure there are other ways to do it, but this one works for me.
Those turned out adorable and your tutorial was GREAT! Great job!
ReplyDeleteHey Robyn!!!
ReplyDeleteHow have you been girl? I adore that pillow. I love anything like feedsakcs, burlap, etc. Your version turned out gorgeous! how I wish I would sew!! I would have these all over my house! I am so, er, SEW impressed with you and your skills and tutorial. Well done!!!
I am going to feature tomorrow on my blog in recap, k?
Thanks, friend, for linking up to Thrifty Thursday on Tales from Bloggeritaville! Great thrifty treasure!
Leigh
Tales from Bloggeritaville
www.lbratina.blogspot.com
Beautiful!!! Love burlap and I love the way your pillows turned out. Your tutorial is terrific! = )
ReplyDeleteI love these, you did a fantastic job. When I change my slipcovers over to white in the spring, I will have to have a few of these prepared to place on the sofa.
ReplyDeleteYour pillows turned out fabulous. Thanks for the tutorial. I like the tip about the rounded corners...good advice.
ReplyDeleteJane
what a wonderful tutorial.. Thank you so much for sharing the process in detail. I am your newest follower and I cant wait to see what your creative mind comes up with next.. so glad I found your blog~!
ReplyDeleteSonny
You did a great job, I love the pillows! You sure were busy and made a lot of them, I like how each has a different design. I'm not sure I'll be able to handle the computer part of the project, perhaps I'll try to stencil something (I'm in the process of making a burlap runner and was thinking about a monogram or something on the ends.)
ReplyDeleteI'm here from Bloggeritaville, she featured us on the same day. I'd love it if you'd stop by sometime!
Have a great weekend.
XO
Heidi - Heart and Home
If you find these missing tomorrow, It was me. I love them. Thanks for sharing, I am going to try them as soon as organization is done.
ReplyDeleteChaCha
Hi Robyn! I'm new to your blog. It's nice to meet you. I'm a new follower and I'm so glad you joined the DIY Show & Tell party so I could see your awesome tutorial. I love seeing burlap projects and yours is so pretty! You did a fantastic job! :)
ReplyDeleteRoeshel
Thanks for that tutorial! Now maybe I will have the courage to try it myself!!!
ReplyDeleteThanks again,
Polly
i LOVE these. I so wish I had a sewing machine (and knew how to sew for that matter). I have a window bench in my upstairs hallway that I am slowly collecting pillows for. I read with the kiddos there. And the store ones are so expensive. You did an awesome job on these!!!! You could sell them as a little business!
ReplyDeleteOk so you are a life saver. Ive been trying to figure out these forever. I love the burlap, I want it everywhere and I want it to look like a old coffee sack or french grain sacks, or all the fun little things everyone is selling on etsy and showing on blogs. I have already got my burlap for pillows and I was making my own stencils. Lol, not an easy task. So where do I get transfer paper and how did you come up with your designs.. Amazing!!! Im lost and I dont want to cut out stencils anymore.. Please help!!!
ReplyDeletedecorcreateur@gmail.com
love the pillows great job. im going to try to tackle something like these this weekend
ReplyDeleteHi -
ReplyDeleteI've been using the digital transfer images purchased on ETSY to make linen pillows, with great success. But I love the primitive LOOK of burlap. I just hate the way it feels, smells and sheds! So I finally broke down and bought a few yards. I quickly hemmed the raw edges - got a rash and a sneeze attack - then washed and dried it 3 times! Huge amounts of lint in the dryer trap, but each time the lint got softer! After the third time, I was able to iron it (cotton setting, water spritz) and then use the transfers. Now I'm a convert. The smell is gone, it feels "tweedy" instead of prickly, and boy does it ever take the detail on those transfers! I also have been buying really great transfer paper from New Millford Photo online, which I highly recommend. Not rubbery, and you can iron on top of it - much better than the transfer sheets you can get at craft or office supply stores.
I also finish my pillows with ticking for welting - which makes it easier to sew closed, and adds an addition French touch!
Love your blog! : )
Kathie
These turned out great. Thanks for sharing. Tina
ReplyDeleteThe pillows are awesome! This is probably a dumb question, but do you have to cut the image at any point?
ReplyDelete